|
Analysis of
Variance (ANOVA) in SPSS.
The ANOVA family of analysis are used for testing
whether or not a significant difference exists between more than two
groups. There are many forms of ANOVA which allows it to be used in a
variety of situations. The simplest is the oneway ANOVA which is used
for testing multiple groups of one independent variable's effect on one
continuous or nearly continuous dependent variable. The oneway name
implies one independent variable.
All examples below will utilize the
ExampleData001.sav
data file.
(1) Oneway ANOVA
First, click on Analyze, Compare Means, One-Way
ANOVA...
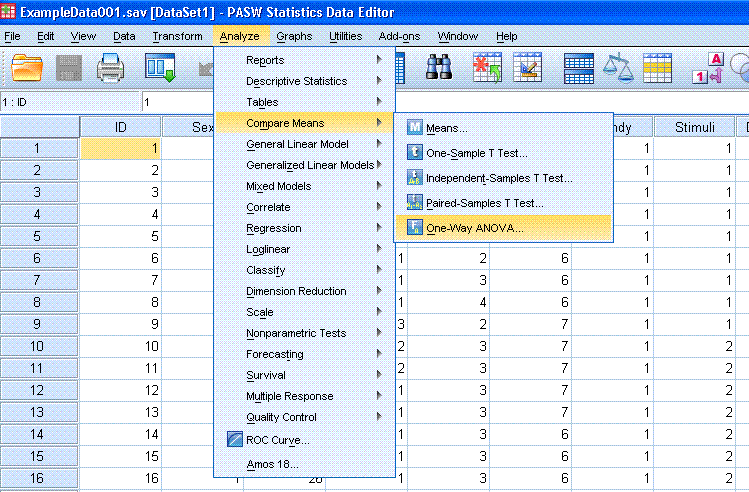
Next, highlight / select the Recalled (Time1)
variable and use the top arrow button to move it to the Dependent List:
box. Then, highlight the Stimuli Presented variable and use the bottom
arrow button to move it to the Factor: box.

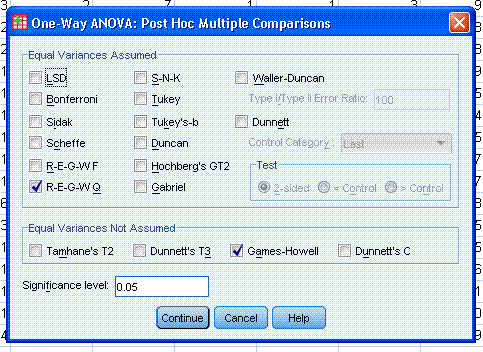
Next, click on the Post Hoc... button and specify
which tests you want for equal variances assumed and equal variances
not assumed. Then click the Continue button.
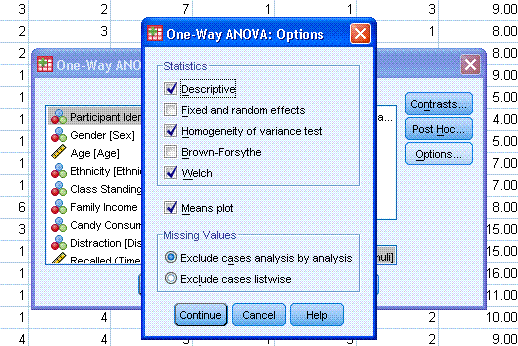
Next, click on options and select Descriptive
(provides descriptive statistics for each group), Homogeneity of
variance test (a Levene's test for testing the assumption of equal
variances), Welch (a robust F test), and Means plot
(provides a line graph showing each group's mean). Then click the
Continue button. Then click the OK button.
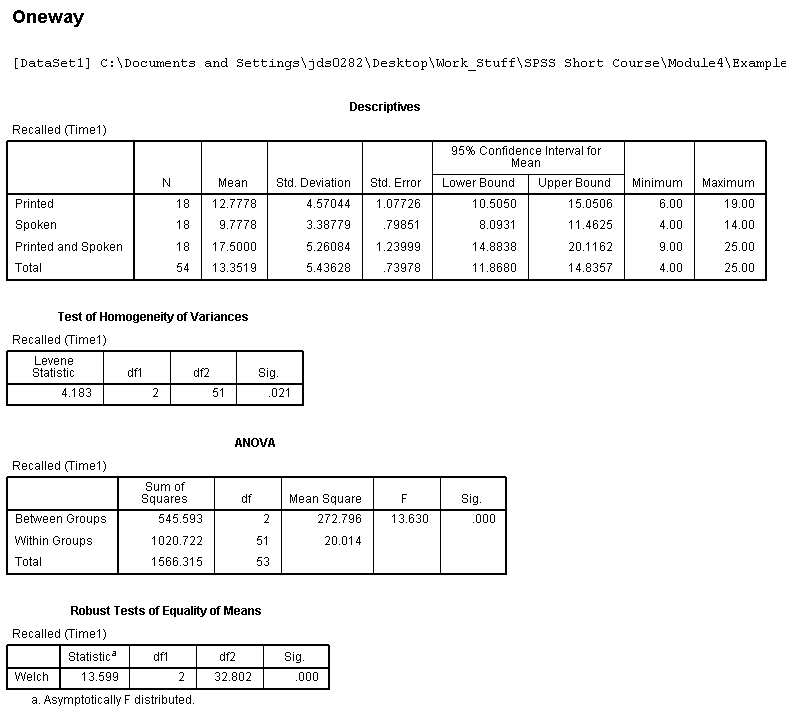
The output should look like that displayed below.


The means plot is a graphical representation of
the differences between the means, but a much better graphical
representation can be produced using the Boxplot function.
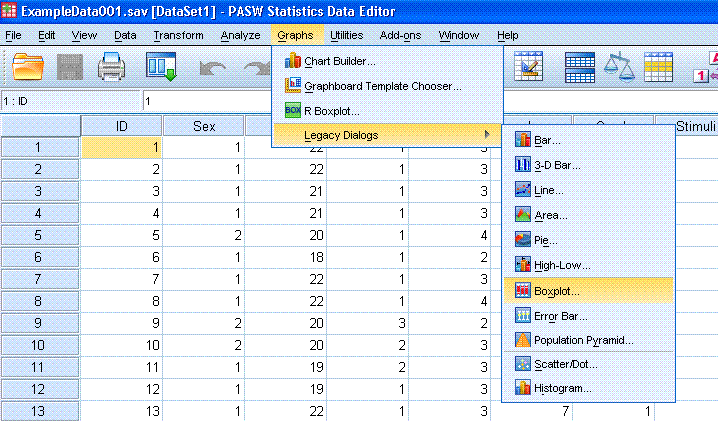
First, click on Graphs, Legacy Dialogs, Boxplot...
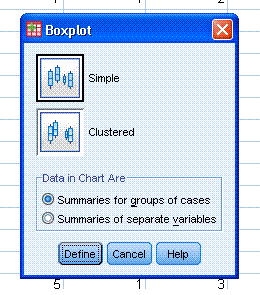
Next, click the Define button (the default Simple
and Summaries for groups of cases are appropriate for this example).
Then, highlight the Recalled (Time1) variable and use the top arrow
button to move it to the Variable: box. Then, highlight the Stimuli
Presented variable and use the second arrow to move it to the Category
Axis: box.
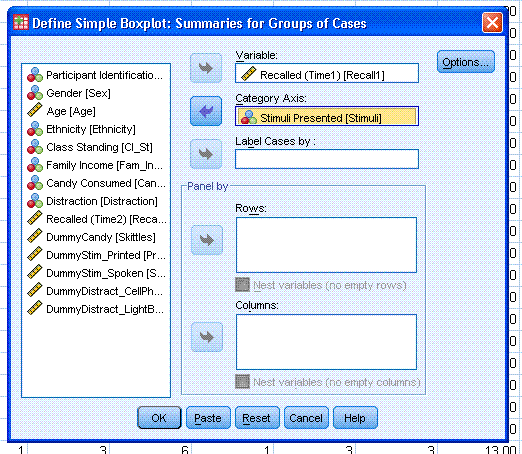
Then, click the OK button. The boxplot should be
similar to the one displayed below.
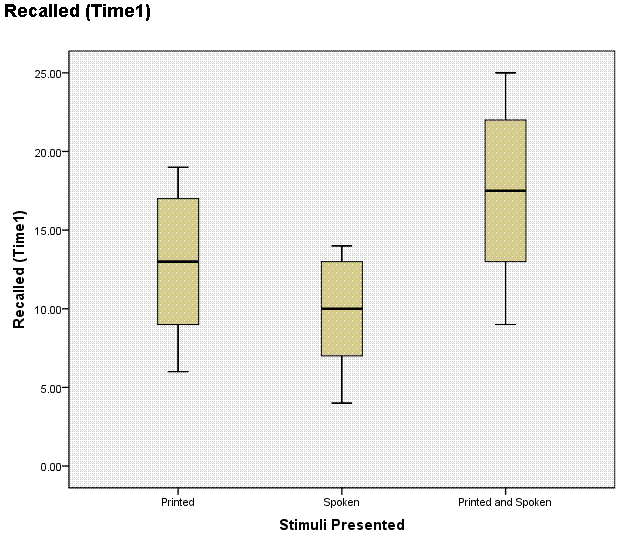
The boxplot above really highlights what the ANOVA
does for us. It uses variance to test for mean differences. The ANOVA
does this by comparing the between groups variance to the within groups
variance. If the between groups variance is greater than the within
groups variance, then we tend to have a significant effect. Looking at
the boxplot, if we focus on the height of the Printed group's box and
whiskers, then we see a representation of that group's variance (i.e.
within that group variance). If we visually sum
each group's variance, then we have our within group variance for
comparison to the between group variance. The between group variance
can be seen by comparing the horizontal line of each group's box (their
means). Going further, the Levene's test for homogeneity of variance is
specifically concerned with whether or not the variance of each group
is significantly different (from one another). If the Levene's test is
significant (e.g. p < .05), then the
assumption of homogeneity of variance is violated and we cannot have
confidence in the omnibus F
test results. To be more
specific, we could not be confident that the observed mean differences
were attributable to the conditions of each group or if those
differences were attributable to individual by treatment interaction
effects (also called a subject by treatment interaction). Since the
Levene's test was significant, we would interpret the Welch's Robust
test table rather than the ANOVA summary table when interpreting the F
statistic. We would also then interpret the
Games-Howell post hoc results rather than the REGW-Q. As mentioned in
the t test tutorial, consult
this
article for a more thorough discussion of the Levene's test
and the homogeneity of variance assumption. We can interpret the
Welch's Robust ANOVA as indicating a significant mean difference among
the the participants of three groups in terms of their number of words
recalled, F(2, 32.80) = 13.60, p <
.001. Furthermore, the Games-Howell post hoc testing reveals a
significant difference between the Printed and Spoken group and the
Printed group, as well as a significant difference between the Printed
and Spoken group and the Spoken group indicating that the group which
received both types of stimuli recalled significantly more words than
each group receiving only one type of stimuli.
(2) Oneway ANCOVA
The Oneway ANCOVA is an extension of the oneway
ANOVA. The oneway Analysis of Covariance (ANCOVA) simply allows us to
test for mean differences among more than two groups of one independent
variable while controlling for one or more continuous or nearly
continuous covariates.
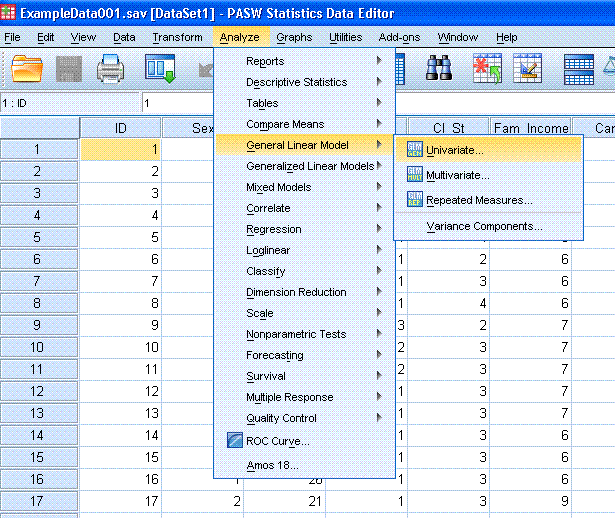
First, click on Analyze, General Linear Model,
Univariate...
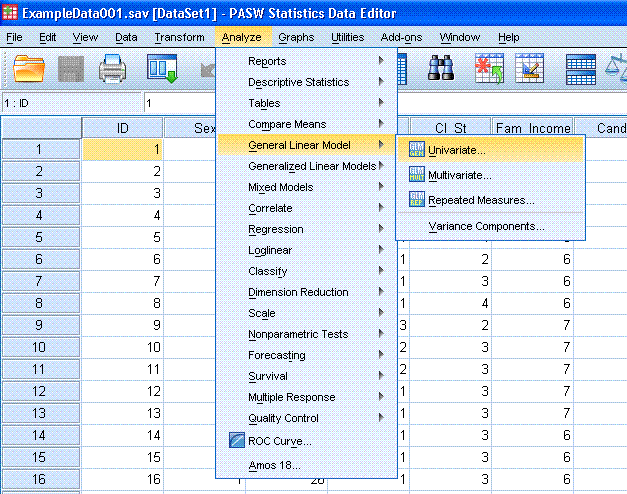
Next, highlight the Recall (Time1) variable and
use the top arrow button to move it to the Dependent Variable: box.
Then, highlight the Stimuli Presented variable and use the second arrow
button to move it to the Fixed Factor(s): box. Then, highlight the Age
variable and use the fourth arrow button to move it
to the Covariate(s): box.
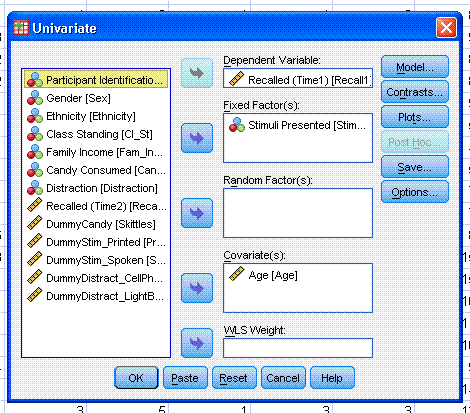
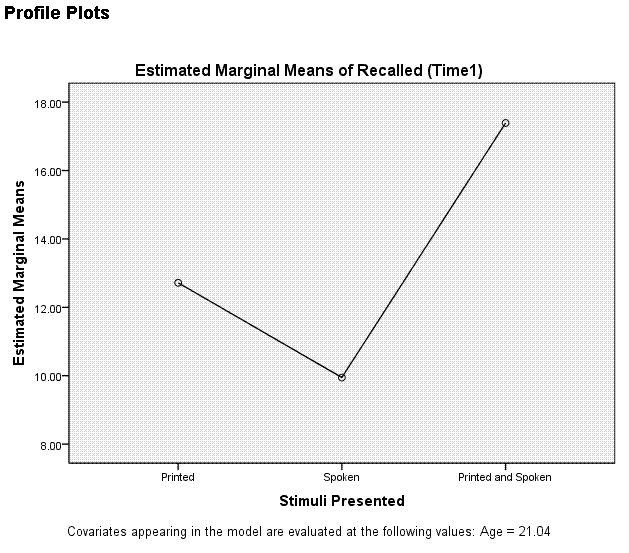
Next, click on the Plots... button. Highlight the
Stimuli variable and move it to the Horizontal Axis: box. Then click on
the Add button to move it to the Plots: box. Then click the Continue
button.
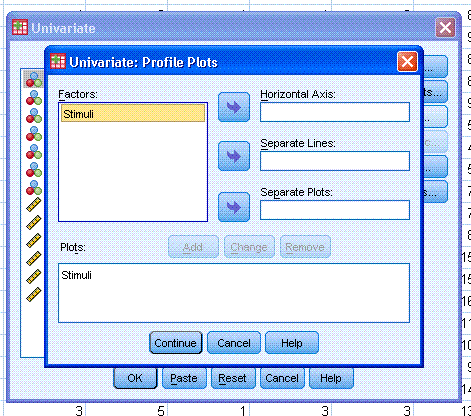
Next, click on the Options button and make sure
OVERALL has been moved to the Display Means for: box. Also select
Descriptive statistics, Estimates of effect size (provides Partial Eta
squared), and Homogeneity tests (Levene's). You may be tempted to
select Observed power, but recall this is virtually irrelevant. As a
good researcher, you will have calculated the appropriate sample size
based on the level of power and effect size desired prior to collecting
your data. Next, click the Continue button, then click the OK
button.
The output should be similar to what is displayed
below.

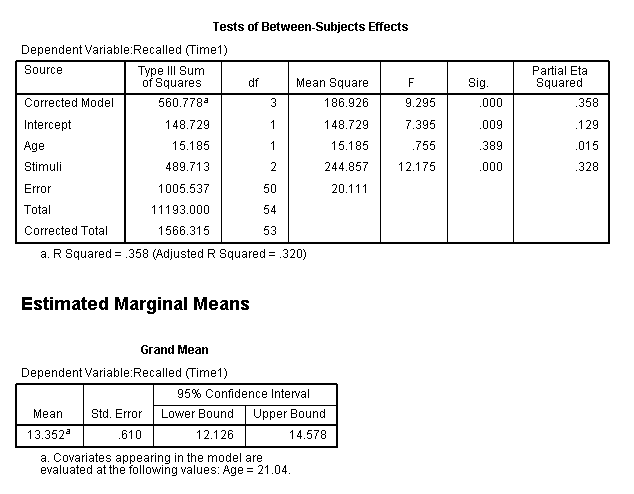
We can see from the ANOVA summary table, Age does
not have a significant effect on Recall (Time1). However, the Levene's
test was significant (p < .05) which means we
have violated our assumption of homogeneity of variances. So, although
we appear to have a significant effect for Stimuli Presented. Also of
note is our effect size; the Partial Eta squared (partial η? = .328)
indicates that only 32.8% of the variance in Recall (Time1) is
accounted for by our independent variable Stimuli Presented after we partial
out the influence of Age. Furthermore, Eta squared tends to be an
overestimate of the relationship in the population so, we can safely
assume and even weaker relationship than what we have here in this
sample. A better estimate of effect size in the ANOVA situation is
Omega squared:

Omega squared offers a less biased estimate of the
amount of variance accounted for in our dependent variable by the
independent variable effect(s).
(3) Factorial ANOVA
The Factorial ANOVA is an extension of the Oneway
situation where the design is composed of more than one independent
variable, each with two or more groups (sometimes called multi-way
ANOVA). The major benefit of factorial ANOVA is the ability to
investigate interactions among the independent variables. The Factorial
ANOVA is still considered a univariate analysis (as opposed to a
multivariate analysis) because, it deals with only one dependent
variable (where the multivariate ANOVA deals with multiple dependent
variables).
Start by clicking Analyze, General Linear Model,
Univariate...
Next, highlight the Recalled (Time1) variable and
use the top arrow button to move it to the Dependent Variable: box.
Then, highlight the Candy variable and move it to the Fixed Factor(s):
box. Then highlight the Stimuli Presented variable and move it to the
Fixed Factor(s): box also. Notice we could specify one or more
covariates and make this analysis a Factorial ANCOVA. Next, click on
Plots...

Now move Stimuli to the Horizontal Axis: box and
move Candy to the Separate Lines: box. Generally it is preferable to
have few lines and the variable with more groups listed along the
x-axis. Next, click on the Add button. Then click the Continue button.

Next, click on the Post Hoc... button.
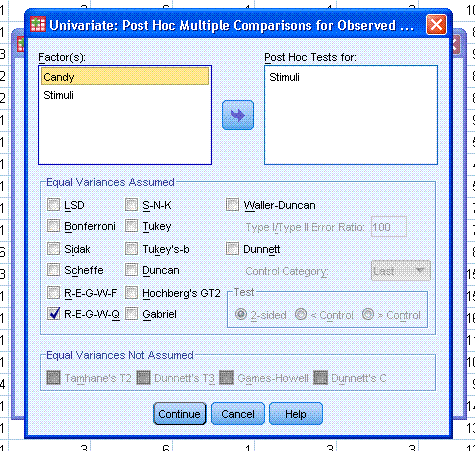
Now, because we only have one (of two) independent
variable with more than two groups, we will need to specify post hoc
testing for that variable. Here we have specified the REGW-Q. Click the
Continue button, then click on the Options... button.
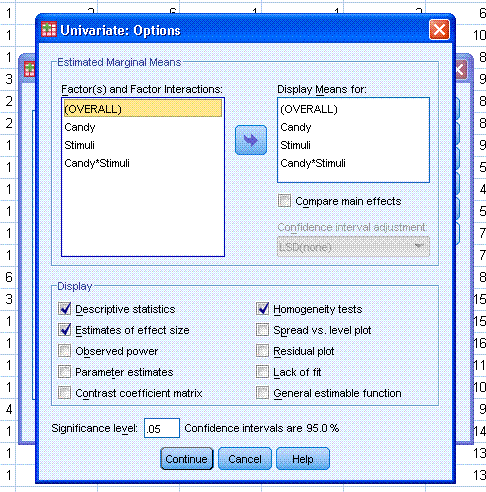
Here we specify which variables we want a means
chart displayed for, as well as the usual descriptive statistics,
estimates of effect size, and homogeneity tests. It may seem silly to
ask for displayed means and also the descriptive statistics; however,
if there are un-even cell sizes, they will be different. Therefore, it
is good practice to always ask for a display of means for each variable
and the descriptive statistics. Next, click the Continue button and
then click the OK button to complete the analysis.
The output should look similar to that displayed
below.

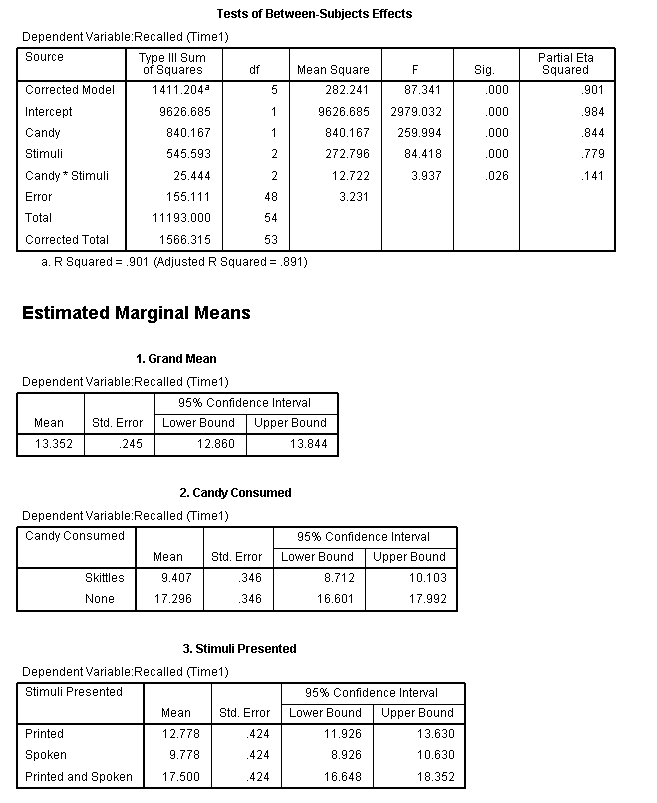


We can see from the Levene's test table, the
assumption of homogeneity of variances was not violated. According to
the between subjects effects table, it appears we do have significant
main effects for both Stimuli Presented and Candy; as well as a
significant interaction between the two (p <
.05). Simple effects analysis would be necessary to
tease out where the interaction effect is actually significant (among
all 6 conditional cells). Although, the Partial Eta squared value
associated with our interaction effect is rather paltry.
Simple Effects Analysis
Unfortunately, SPSS does not allow for
specification of simple effects analysis through point and click
options. One must use syntax to get the tests of simple main effects.
So, if we return to the Data Window, click on Analyze, General Linear
Model, Univariate... once again.
We notice the previous run and all its options are
still specified. This time however, instead of clicking the OK button,
we need to click the Paste button; which opens a new syntax window with
the syntax written as specified through the use of the point and click
dialog and options.

Next, in the syntax window, we need to insert a
line (or lines) specifying the simple main effect test we want. For the
current example, we will test for differences in Stimuli at each level
of Candy. The necessary line has a red ellipse around it: /EMMEANS =
TABLES(Stimuli*Candy)compare(Stimuli)
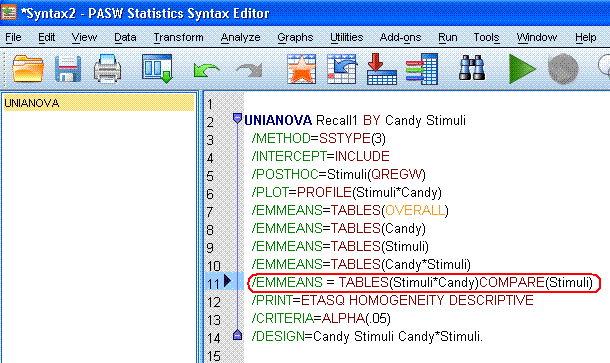
If we then highlight the entire syntax and click
the green triangle (run selection) button, we should get an additional
table in the output which provides us with the desired tests.

So, we see we have a significant effect for
Stimuli Presented at each of the two levels of Candy (p
< .001).
|